Sorry I've been so rubbish with blogging lately, with work and actually finding time to sew I've been sleeping rather than blogging but that is about to change! With effect from today I will be posting a creation every Sunday without fail, and maybe a few extras during the week - stay tuned lovelies!
So, if you read my previous post you'll know that for the past two weeks I have been working on my first made to measure project for my friend Katie. What a challenge it was, but I really enjoyed it, even after all the long nights at the sewing machine and definitely will be doing it again! Though without such a tight deadline next time.
Anyway, Katie had been looking for a 1960's shift dress, a little like those pictured below, and so I got to work with some poorly drawn sketches pretending I knew what I was doing. I still had a long way to go...
Anyway, Katie chose some lovely nautical blue and white striped fabric from Minerva Crafts, however it turned out to be a little thinner and a bit more see through than we anticipated, which was actually a blessing, as it meant I could do all the fittings with the lining. It also meant I could learn how to line something!
So I went to Leeds Kirkgate Market to find some plain white lining material and whilst I was there picked up Simplicity pattern 1197, which I thought would be perfect. However, by the time I got it home I realised that the pattern was completely different, had a front panel which wasn't suitable for the striped pattern of the dress, so in the end I kind of had to wing it!
The lining fabric was a dream to work with, and I was particularly proud of how it turned out...
The next day Katie and I met at work and went to some unknown toilets in the building that I work in for the first fitting. Some people tried to visit the loo, don't they know that is my dressing room!
Sadly I was a tad generous with adding inches and the forgot how petite the lovely Katie is and so the dress ending up looking like a lab coat. But no matter, it's always easier to take in than take out. This is how it looked after pinning...
In total 4.5 inches were to come off, the sleeves to be cut down by 8.5 inches and 6 inches off the hem. After this I took the sleeves off, took it in at the side seams, the back, and then down the front to keep it in proportion and take in the shoulders. Everything fit for our next fitting and so I started on the outer fabric.
As it turned out, the fabric was much thinner than I anticipated and frayed very easily. But this is not yet an issue in this story...
I managed to finish it in 10 hours last Wednesday due to taking annual leave. I was shattered but immensely proud of finishing it before the Thursday deadline and showed all my colleagues with pride...
Unfortunately, when adding the lining to the outer it had eaten into my seam allowances and the perfect fit was no more. The bust was still too big and the skirt too narrow. The final deadline was the next day so I made it a mission that night to fix it. After a visit to my favourite Haberdashery and a brainstorming session with the owner I fixed the issues with the use of pleats.
It took 5 hours, and I finished at 1am, and then did some more on my commute the next morning, but it was done. Luckily I took some photos before I crashed out.

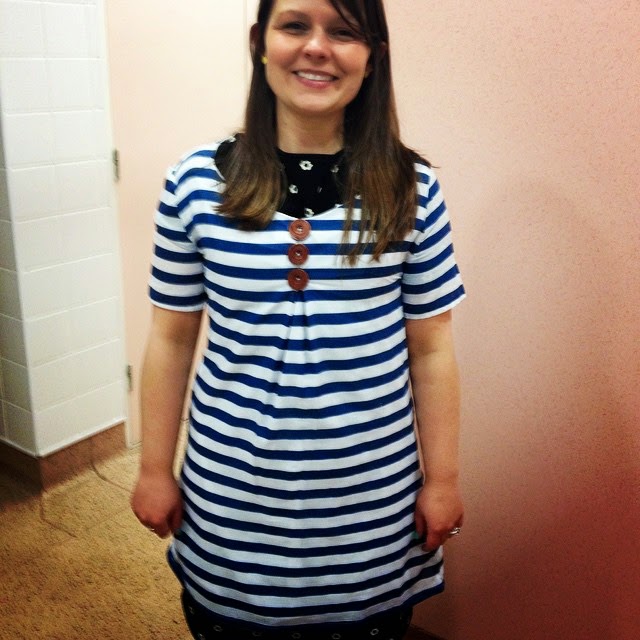
So it's far from perfect, the sleeves could do with some work and due to the fragility of the material the seams are frayed to unpicking and picking, but it's done. In a way I feel like it was a blessing in disguise as I think the buttons add a certain something to it. The additional pleat at the back was a good call too as the side seams just couldn't be taken out much more.
I don't think I've done a bad job though for my first piece... I mean, look at this pattern matching...
It's a bit off but come on! For a first timer that's pretty awesome.
At the end of it all, Katie was smiling, she's wearing it over another dress but that makes the fit even better. She can't currently lift her arms all the way over her head as I need to take the sleeves and the armholes a little further out, but it zips and it fits!
And due to me hoping to make a business out of this (one day...!) I even made a little tag...
So there it is, my first made to measure project, the first of many more I hope! Please let me know what you think and any tips or comments you may have and until next time folks!
Don't forget to follow me if you like my stuff, I'm on Bloglovin' too, and share this with any fellow crafty friends!
Til next time, Kat xx


.jpg)
No comments:
Post a Comment