Sometimes there just isn't the perfect pattern for what you have in mind, that's what myself and my beautiful sister found anyway. As mentioned in my previous post, she had come home with an idea in mind of the shirt and skirt ensemble that she wanted and challenged me to create it for her. As you will have seen in my last post, pattern drafting/hacking was completely new to me and I sat staring at the 'pattern drafting paper' (I'm too stingy for the real stuff, so use greaseproof instead) for probably several hours in total. I created my own instructions and I pinned and tucked on a mannequin for quite some time before I even got up the guts to cut the fabric out.
My intention had been to hack Simplicity 6107 and just add a collar. Unfortunately, and I'm not sure why, this didn't quite work. So instead, I only used the position of the darts from the commercial pattern and the rest was drafted by myself. I'm not sure, but I think that's how pattern blocks are used? Maybe I should get a block or something. Maybe I should find out what that actually is...
When all this was finally done I worked out my own layplan, took a deep breath, and started cutting out the fabric. The collar is the isosceles triangle on the fold, which was made by measuring from the centre back to where the button stand started. In future I would taper the collar more as it met the buttons, as this part caused me issues in the final fit. Due to intense paranoia, I put it all on the mannequin again before tackling sleeves or anything. I quite liked how it looked like this and decided to make my own sleeveless and collarless version in the same fabric once it was done!
I was happy, added the sleeves, tackled with the collar which was faced with heavyweight interfacing. I folded over a seam for it and kind of slotted it onto the neckline. Once the sleeves were added, my sister came home for a fitting and we decided to shorten them. I then drafted another heavily interfaced cuff to add to the sleeves, so that she could roll them up and still have the right side of the fabric showing. Like so...
 |
| Cuff down |
 |
| Cuff 'rolled' up |
All that was left after that was to add the adorable buttons and attach hooks and eyes to avoid the neckline being a bit sexier than intended. And this is it finished!
Teamed with the circle skirt I made first for the whole outfit the whole finish is simply stunning. The yellow of the skirt really draws out the shirt fabric and we have coordinating buttons on the shirt for the finish. I also made her a matching wired headband in the skirt fabric and we used the prettiest daisy button ever to be made to finish it.
 |
| "Look nonchalant" |
 |
| The smile on her face made the stress worth it |
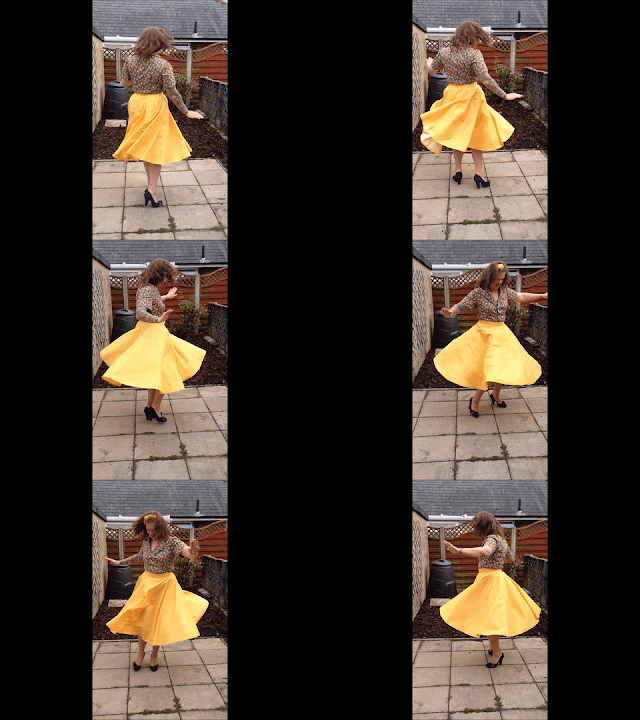
Heather has ordered a petticoat online to add some oomph and flounce and other exciting words to the spin of her skirt.
Nearly two years ago I started sewing again, and in January 2015 I sat down and shouted at my first commercial dressmaking pattern in confusion and panic. I never thought back then that I'd still be dressmaking, never mind drafting and fitting a whole outfit to someone else. When it was finished and she put it on I was not only beaming with pride but also nearly tearful. This was the result of a lot of hard work and is proof of how far my skills have come. Dressmaker fo' life.
And if you read that little cheesy paragraph... here's your reward, because it's wrong to make a circle skirt and not do this...
I've also had a request on reddit to digitise and publish the pattern that I made for this shirt, so expect that on Etsy soon! (which, in teacher language, means October half term now...)
Til next time loves,
Katharine xxx


No comments:
Post a Comment